Everything you need to start vlogging in 2026
This is one of the questions we get the most, from filming to audio to editing software. Han and I have been filming our travels now since the summer of 2023, and have had our own individual experiences leading up to that venture.
We’ve changed and upgraded the equipment and software we use multiple times, and will likely continue to do so as we learn more and continue to evolve with our channel.
That said, there are vloggers and YouTubers much bigger than us who use far more professional equipment. The key is finding the sweet spot for what you want to do. So, this is ours.
Here’s everything you need to know about filming your first vlog, from our perspective.
Camera
This won’t be a surprise. To film your first vlog, you’re going to want something to film it on. Han and I started out with a Canon Powershot G7X Mark II on an adjustable tripod. We only did that because I’d bought that camera a couple of years prior for a sports business.
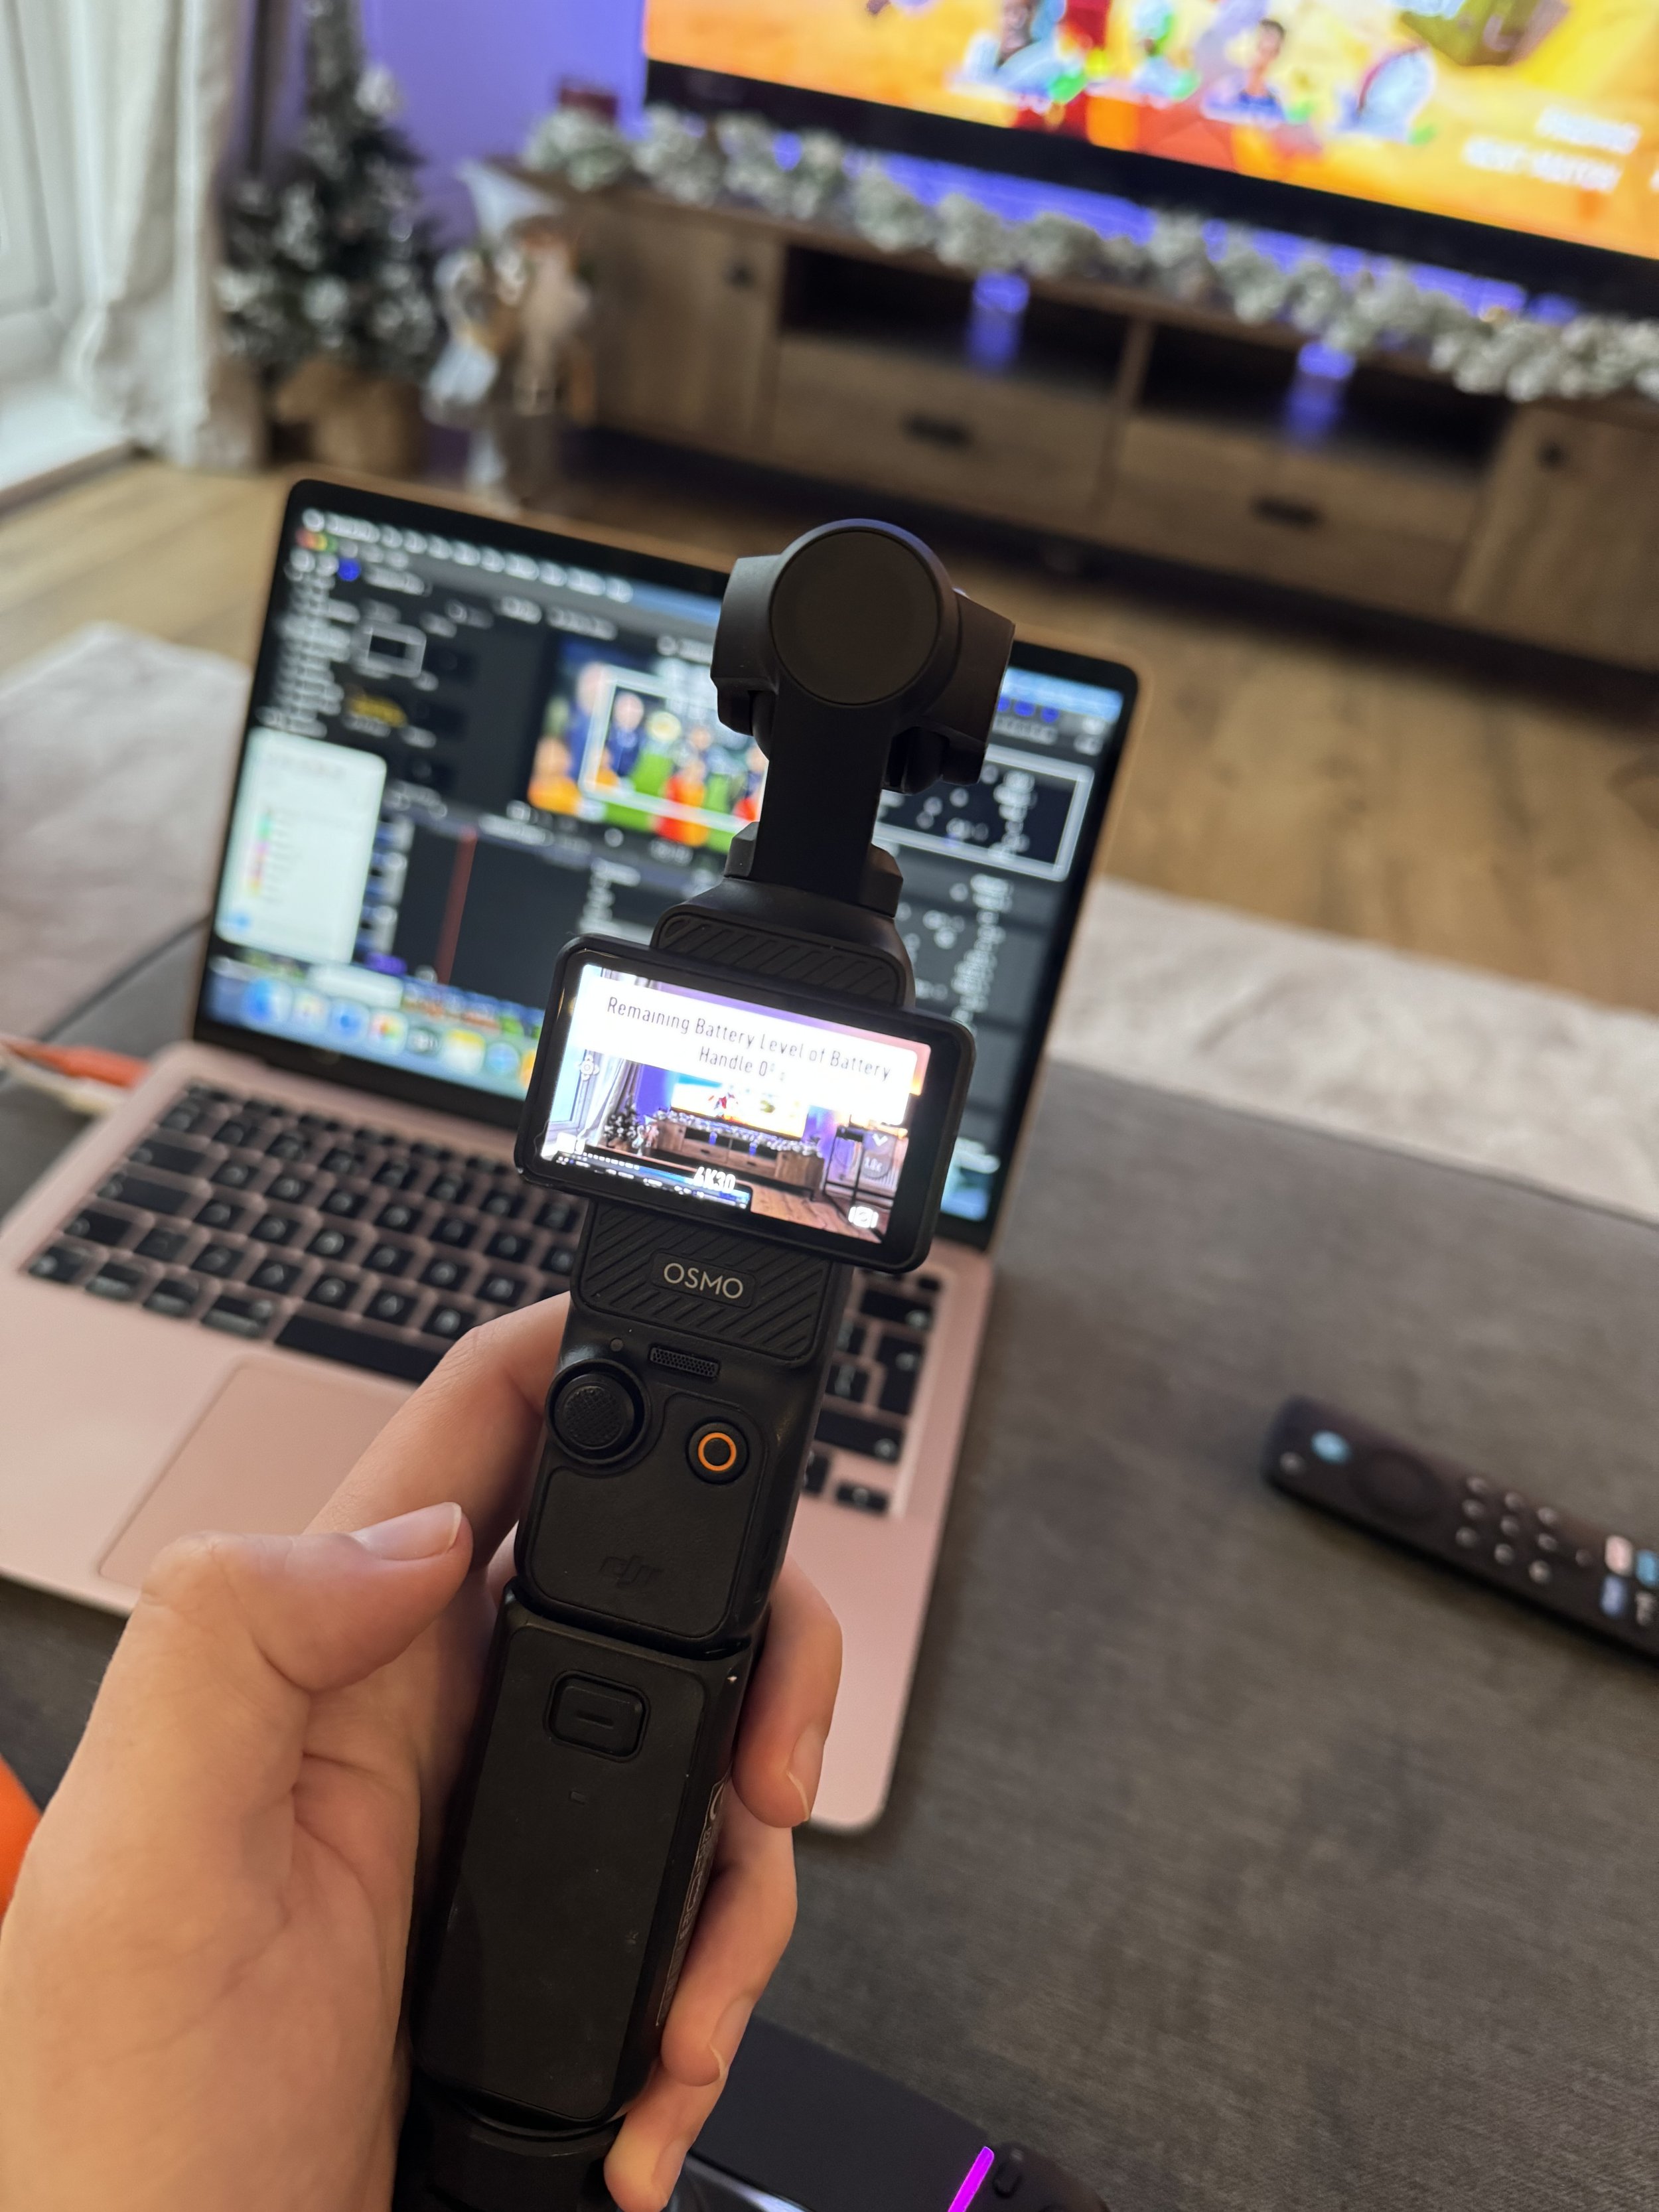
The G7X films beautifully, but it doesn’t have the built-in gimbal of our current camera, and it doesn’t shoot in 4K. So after our first couple of vlog series, we reinvested some of the revenue from our channel into the DJI Osmo Pocket 3, and that thing changed the game.
Before we talk about the DJI, just a heads up that I’ve also included a budget option where relevant in this post, so the idea of purchasing what you need to start vlogging doesn’t seem too daunting.
At the time we paid just shy of £700 for the Osmo Creator Combo, which you can now buy brand new for just under £500. Here it is at £479 with John Lewis.
The price has started to drop because the Osmo Pocket 4 is expected to arrive around April of 2026, with a dual-camera setup. We don’t yet know how much further advanced the new edition will be, but it’s worth keeping in mind if you were looking to buy one and wanted to wait.
The Osmo Pocket 3 creator combo comes with the camera, a mic, a battery handle, screw in tripod, wide angle lens, and a protective cover. It all fits neatly in the included DJI camera case, and only takes up a small space in your carry-on luggage or backpack, etc.
Tip: We adjusted our settings on the camera to film in 4K at 30FPS.
Budget Option
Everybody has an iPhone these days, so just like we did with a camera we already owned, you can kick off with your iPhone. I would, however, suggest buying a compatible gimbal, as the smoothness of your content is crucial to the overall quality and viewer experience. Here’s the one Hannah owns from DJI.
If you then bought a budget mic (or two), you’re well on your way.
2. Micro SD
If you choose to go for the Osmo Pocket 3, you will need a micro SD card to use as storage. Han and I typically take 2/3 out with us on each day we film, in case we need them.
The ones we buy are the Gigastone Micro SDs, with 256GB of storage per card. That equates to around three hours of filming per card. You must buy 4K-compatible storage cards for your Osmo Pocket to make sure you’re getting the best quality out of the camera.
Micro SDs typically come with a regular SD-sized converter.
You will need a plug-in SD/Micro-SD to lightning/USB reader, so you can plug your memory cards into your computer and transfer your files.
This one on Amazon has both the SD and Micro SD slots, and they’re pretty cheap. Shouldn’t be more than £5. Han and I always have at least two of these on us in case we lose one. This one is for Mac, but you’ll obviously need a regular USB for Windows/PC.
3. Storage
We had some trouble here early on with various external hard drives. Storage is one of the biggest bumps in vlogging and editing, unless you have a mammoth PC with worlds of storage.
It’s also one of, if not the most important part of vlogging.
Nobody wants to film all day and then have to protect a micro SD with their life until they get to editing that footage. They’re small, and I would definitely lose one eventually. Instead, we transfer all of our footage to an external drive at the end of every day.
We have two Samsung T7s, each with 2TB of storage. They were around £170 each at the time, but an essential for the safety and security of our footage. We’ve had ours for over two years now, and they’ve been flawless. You can get them on Amazon for under £150.
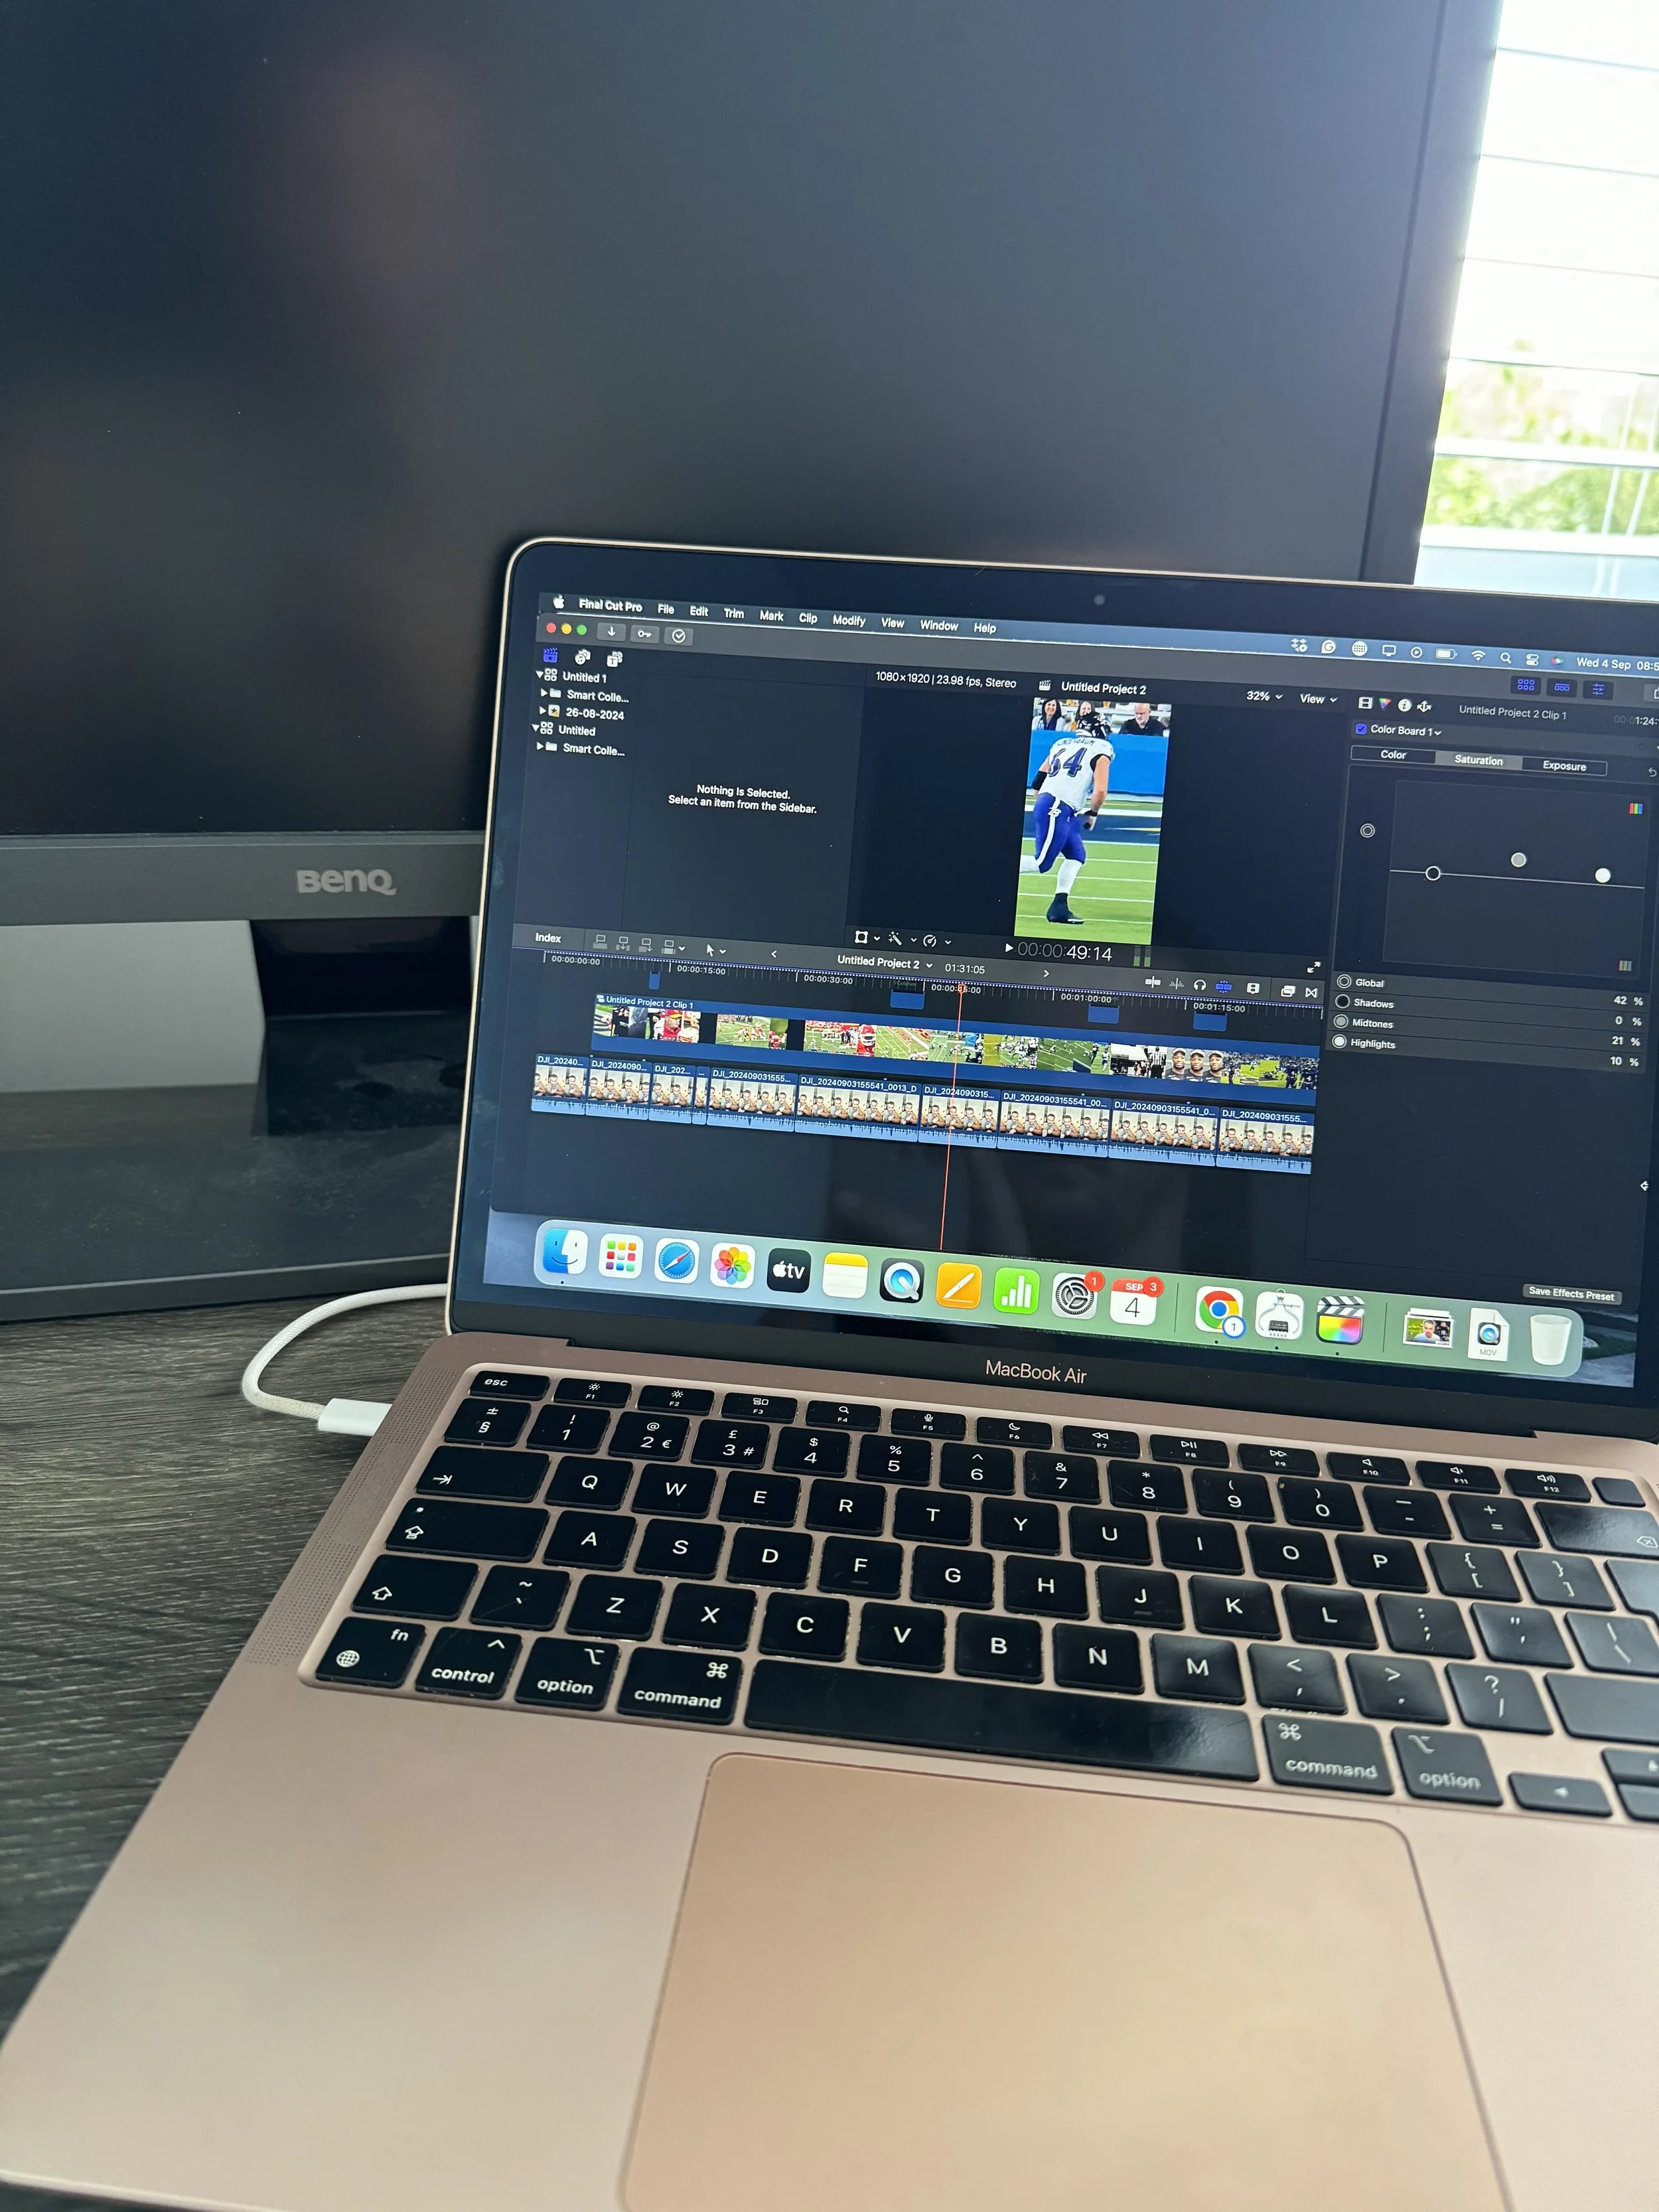
We then edit off of those SSDs directly, which saves internal storage on your laptop. This is key. Instead of transferring the files onto your laptop, you move the footage from the SSD directly into your editing software. If you have MacBooks like ours with 256GB of internal storage, this is a game-changer.
Why the Samsung T7 or SSD?
Since we have both edited from laptops for a long time, early in our vlogging journey, we found we were running out of storage halfway through just about every video we filmed. The solution was to buy external storage, but we got it wrong the first time around. Here’s how, so you can avoid the same mistake.
We initially bought LaCie HHD external hard drives. They come recommended, and they’re good, but they were unreliable for us. When we switched to Samsung T7 portable SSDs, they changed the game.
The LaCie would often disconnect, and we later found out that HDDs run off of spinning magnetic platters (Google terminology, not mine), while the SSDs have no internal moving parts. This means that if you nudge it or pick up and move your laptop with the Samsung T7 or SSD attached, it won’t disconnect. The HHD’s are a problem here. They’re sensitive, and you have to tiptoe around them and make sure you don’t move them at all while working from one or completing a file transfer.
Fine for desktop PC usage, not ideal if you’re on the move, editing off of a laptop, or working in a coffee shop or remote location.
From our user experience, the Samsung T7 is absolutely worth the extra cost.
4. Audio
Since buying the Osmo Creator Combo, we have bought two more battery handles and a second mic, to make sure we have good quality audio and enough battery to last us a 10+ hour filming day.
If there are two of you, one mic won’t suffice. You will either need to have two mics or use the internal mic of the camera itself.
This decision largely comes down to what you’re trying to do with your footage. The mics will elevate your voices, but they’ll also reduce the sounds of the parks in the background (if you’re filming at Disney). This is great if it’s a busy area and you want to control the crowd noise in your footage, but not so much if you want to film the sights and sounds of a firework show from a distance.
Han and I tend to put mics on and take them off many times in a day, depending on the situation. It just takes some getting used to.
5. Battery/charging
As I mentioned earlier, we now have three Osmo battery packs and the battery of the camera itself. The camera has a good amount of charge, but the battery packs carry their own charge, and also recharge the camera.
Even with three battery packs, we have come close to running out of power towards the end of the day. Again, we tend to film three to four hours of footage a day, and the camera will be on longer than that when you consider time in between shots, etc.
You’ll also need to think about the battery life of your mics.
We take portable chargers with us on a filming day, so that we can recharge the mics on the move. We have also had days where we needed to go back to our hotel or find a coffee shop so that we can recharge our mics if we need them for the evening.
In short, consider how much filming you are likely to do in a day, and make sure you’re prepared. There’s nothing worse than your camera dying before you get to film the evening portion of your video.
6. The transfer and recharge process
When we get back to the hotel/house each day, there’s a whole hoo-ha that needs to happen before we shut down. When we finish a vlog, we then need to safely transfer the footage and recharge everything for the next day. This is where it can get messy.
The first thing is to take the Micro SD(s) you filmed on that day, and plug them into your laptop along with your external storage (Samsung T7 in our case). We then copy and transfer the files onto Hannah’s T7, and then do the same thing onto my T7. That way, we have the footage stored safely in two locations, in case one of the SSDs is lost, stolen, dropped in the toilet, etc.
Make sure you check the footage is readable and viewable before clearing your Micro SDs, ready to film again the next day. This is crucial. Don’t just wipe them in case you didn’t complete the transfer, or for any reason it didn’t work.
Once you’ve stored your files, everything needs to be charged for another filming day. This means two iPhones, the camera itself, three battery packs and two microphones, all with the same USBC port. Make sure you have more than one cable…
7. Editing software
I still swear by Final Cut Pro. If you’re a Mac user, it’s the best editing software, easily the most reliable, and I love it. Han and I have both used it for years, but it is expensive (upfront). Keep in mind that it is Mac only. More on that in a second.
Final Cut Pro is $300, but it’s a one-time fee. I bought mine about 14 years ago, I was maybe 17? And I’ve used it ever since. So yes, it seems expensive, but when you then consider a lot of other editing software’s charge a monthly fee, Final Cut Pro becomes the most cost-effective option after around a year.
For example, when I switched to a desktop PC, I had to give up Final Cut Pro. So I went searching for the Windows equivalent, which led me to Adobe Premiere Pro. It costs £27.99 a month, which comes back to the point I made about Final Cut Pro’s one-time fee.
Now I’m sure Premiere Pro is a great piece of software, but the learning curve of it I found to be horrendous.
When I looked into it further, it’s a system that does far too much for what any typical vlogger or YouTuber needs. It’s elite-level software that supports filmmaking and intense editing, which just wasn’t necessary for our channel or our goals.
I then sized down to a software called Movavi, which also runs off of a monthly fee, which I believe is around £20 per month. It’s the closest I’ve found to Final Cut Pro in terms of the software itself and it’s capabilites, but it’s been pretty unreliable, and I just don’t love it.
For context, I will be switching back to Mac and Final Cut Pro when we leave for our March trip. I haven’t got on with the Windows system generally. I’m just a Mac guy, but we can talk about that another day.
Budget Option
You can’t go wrong with CapCut, at least not to begin with, and it’s free. If you’re editing shorts or TikToks on your phone, CapCut is perfect. I haven’t tried to edit a feature-length vlog on CapCut, so I can’t comment on that, but it’s a great free system to use while you’re finding your feet with editing.
8. Colour correction
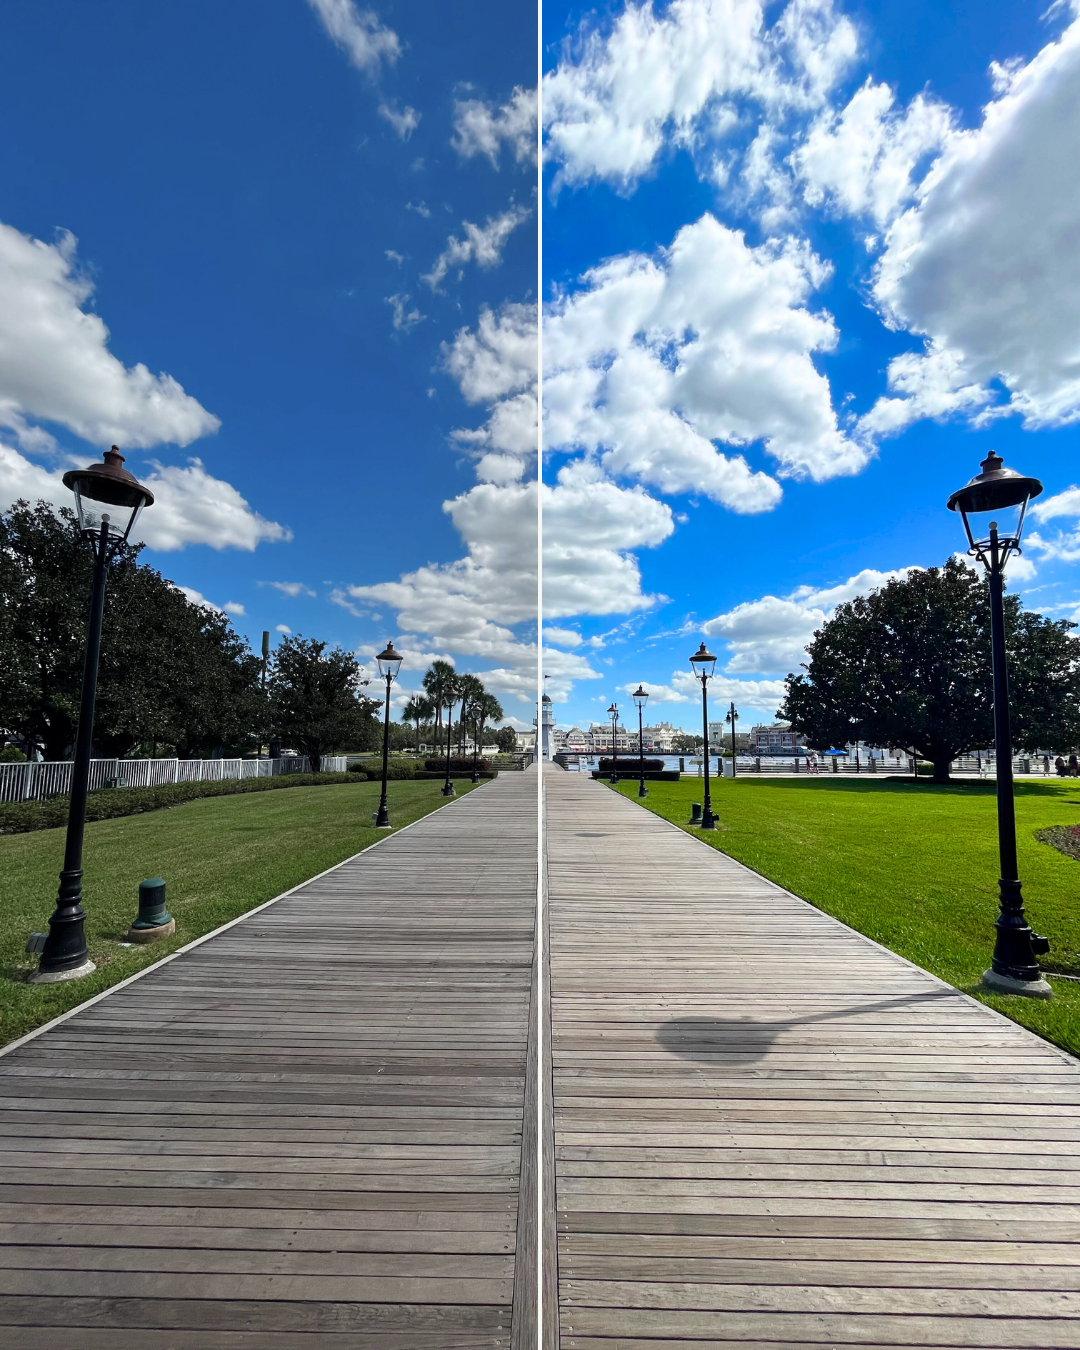
Colour correcting your footage is key. The camera does a great job of capturing the colours, but you can really bring out the vibrancy of your scene with colour adjustments and LUTs.
LUTs are preset colour adjustments. For example, DJI have a downloadable LUT specifically for footage filmed on the Osmo Pocket 3. You can find it here.
A LUT will automatically adjust the colour of your footage, and you can then fine-tune those settings if you feel it’s too bright, or skin colour appears too red, etc.
We tend to adjust the colour, saturation, vibrancy, etc. of our footage manually, but it’s very important that it looks consistent throughout your footage. For example, you don’t want to bring up the saturation of one scene and then when you transition to the next, everything appears dull and gloomy in comparison.
Colour adjustments will add significant value to your content, so this is something I would recommend utilizing from the very beginning.
Look at the difference… It’s the same image, just split down the middle.
9. Audio quality
Regardless of how careful and cautious you are with filming and using mics to reduce background noise, it still happens, and it can still butcher a piece of footage.
We recently discovered a tool that makes a huge difference. The enhanced speech tool from Adobe.
Try this out. Go and drop a piece of footage into the tool in which you’re speaking to the camera, but there’s a lot of background noise. Using the toggles, bring the background noise down to 10%, while leaving your voice at 90%. The difference is magic.
However, what I would say is that you don’t want to eliminate depth from your footage entirely. For example, if you’re sitting in a restaurant, it would come across as odd if you could hear your voice, but the background appears silent. I tend to bring the background noise up to 35-40%, so you can still hear murmurs of conversation, clanging of cutlery, etc., but your voice stands out a lot stronger than it would in the original audio.
There will be times when this tool feels more necessary than others, but again, consistency is key.
The same is true with audio volume. You never want to startle your viewer when you go from one scene to another. For example, if you start off your vlog in your house/hotel room, where the only sound is your voice, and the next scene is entering a busy theme park, it isn’t always a pleasant transition for your viewer.
Think about those movies where you have to constantly fiddle with the remote because their voices are too quiet and the soundtrack or fight scenes of the movie are far too loud. Nothing worse. The same is true for your vlogs. If you cut from voice to music, make sure the transition and the volume of those scenes blends well.
The ultimate goal is to make your videos an enjoyable experience for your viewer. So we try to be conscious of that with the visuals and sounds throughout.
10. Be yourself
Call it a bonus tip. The unique factor of your content is you.
We film at Disney, and everything we film has typically been filmed before. Shows, rides, parades, fireworks. You can find it all on the internet. What will separate you is human connection, and that’s hard to build without authenticity, or letting your personality show in your videos.
When we decided to film our trips to Disney, we were aware that people might not enjoy our videos because we mixed our time a little differently from some of the creators we’d watched ourselves.
We wanted to show more of Disney World, particularly outside of the parks, because that’s one of the things we enjoy the most about visiting. We love going to the parks, but we also love hanging out at the boardwalk, taking a boat to Wilderness Lodge, or exploring any of the other idyllic locations that WDW has to offer. It’s just the speed that we enjoy, which isn’t for everyone, and that’s okay.
Fortunately, the people who enjoy that kind of video found us. Our style isn’t for all, but it is authentic and honest, and true to how we’d spend our time in Florida, whether we were filming or not.
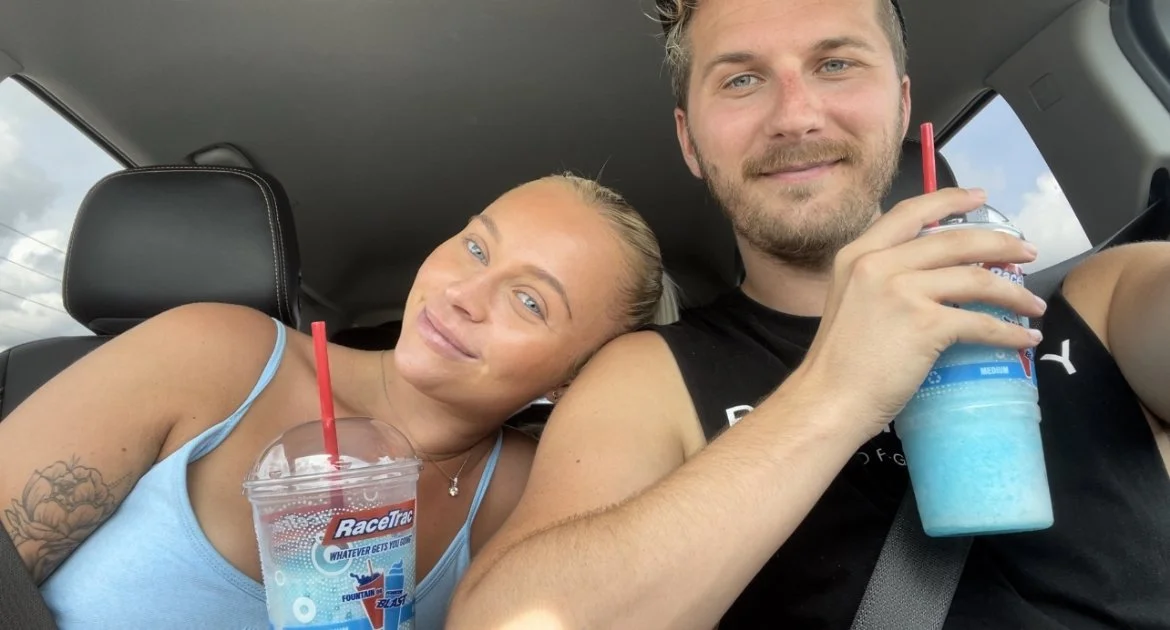
We didn’t know it at the time, but some of the more mundane things about our travels became features of our channel. A blue raspberry Racetrac slush, Fruit Riot, and I’m getting tagged in pictures of water features all over the world. It’s great, and we’re extremely grateful for the community that has wrapped its arms around us.
Filming three hours worth of footage in a day takes work, but it’s easy because we’re just ourselves, on camera. If you’re authentic, the people meant for you will find you.
If you’re a huge Star Wars fan, lean into that. If you hate the Tower of Terror (lol), be honest about it. If you’re a pin collector, take your followers along. If you feel like eating your way around the world showcase on any particular day, take your viewer with you on that journey. Just be real, and the people who share your interests and ideas will gravitate towards you.
Our vlogging journey has already changed our lives in many ways. It’s brought incredible friendships, trips we always dreamed of, and experiences we never would have had without it. We’re extremely grateful for that and will always do what we can to help others with similar goals.
If you have more questions or would like to reach out, hit me at @Alexonlife93 on Instagram.